
How to Build a Wine Cellar: 2026 Expert Guide
Expertly build your wine cellar in 2026 with our step-by-step guide. From climate control to racking and finishes, elevate your collection. Read the guide.
Imagine the joy of uncorking a perfectly aged bottle, knowing you built a wine cellar designed just for you. In 2026, this dream is more accessible than ever.
This expert guide will show you how to build a wine cellar that not only preserves your collection but also becomes a showcase in your home. With growing interest in home cellars, you can add value to your property and enhance your wine experience.
We will walk you through every essential step, from choosing the right space to mastering climate control, racking, and design trends. Let’s begin your journey toward the ultimate wine haven.
Step 1: Assessing Your Wine Cellar Goals and Space
Designing the perfect space to build a wine cellar begins with clear goals, realistic expectations, and a thoughtful plan. Before picking up a hammer or calling contractors, let’s break down the essential first step: understanding your needs and your space.
Determining Your Collection Needs
Begin by analyzing your current wine collection, considering both what you own and what you plan to acquire. Are you focused on reds, whites, or sparkling wines? Do you collect standard bottles, magnums, or a mix of formats? Planning for bottle diversity helps you build a wine cellar that truly fits your lifestyle.
Think about how you’d like to display your bottles—would you prefer label-forward racking, classic horizontal rows, or something more dramatic? Most home cellars comfortably store between 100 and 500 bottles, but your vision may call for more or less. For more inspiration and practical tips on defining your collection goals, explore the Home Wine Cellar Guide.
Choosing the Ideal Location
Selecting the right spot to build a wine cellar is about balancing practicality and preservation. Basements are a traditional favorite, thanks to their naturally stable temperature and humidity. However, spare rooms, closets, or even under-stair spaces can work beautifully.
When scouting locations, consider:
Exposure to natural light (avoid direct sunlight)
Proximity to heat sources (like furnaces or kitchens)
Vibration (keep away from laundry rooms)
Humidity and airflow
A well-chosen location makes it easier to maintain optimal wine conditions and ensures your investment lasts for years.
Understanding Local Building Codes and Permits
Before you build a wine cellar, check with your local authorities to understand building codes and permit requirements. Some regions require permits for electrical work, HVAC additions, or structural changes. You may also encounter rules around fire-rated materials and moisture barriers.
For example, certain municipalities mandate the use of vapor barriers in home cellars to prevent mold and moisture damage. Taking the time to research and secure the right permits helps you avoid costly delays and ensures your cellar is safe and up to code.
Budgeting for Your Project
Setting a realistic budget is key when you build a wine cellar. Costs can vary widely depending on your vision and whether you take a DIY or luxury approach. Here’s a quick comparison:
Cellar Type | Estimated Cost |
|---|---|
Basic DIY | $250 – $1,000 |
Mid-Range Custom | $2,500 – $10,000 |
Luxury Custom | $10,000+ |
Be sure to factor in materials, labor, climate control, racking, and finishing touches. Remember, a well-designed wine cellar can boost your home’s value and provide long-term enjoyment.
Timeline and Project Planning
To successfully build a wine cellar, create a realistic project timeline. DIY builds may take as little as two weeks, while custom projects often stretch to three months or more. Schedule around lead times for specialty glass, custom racks, or climate systems.
It’s smart to plan for the unexpected. Delays can arise from contractor schedules or material shortages. With a clear timeline and flexible mindset, you’ll be ready to turn your vision into a reality—on your terms.
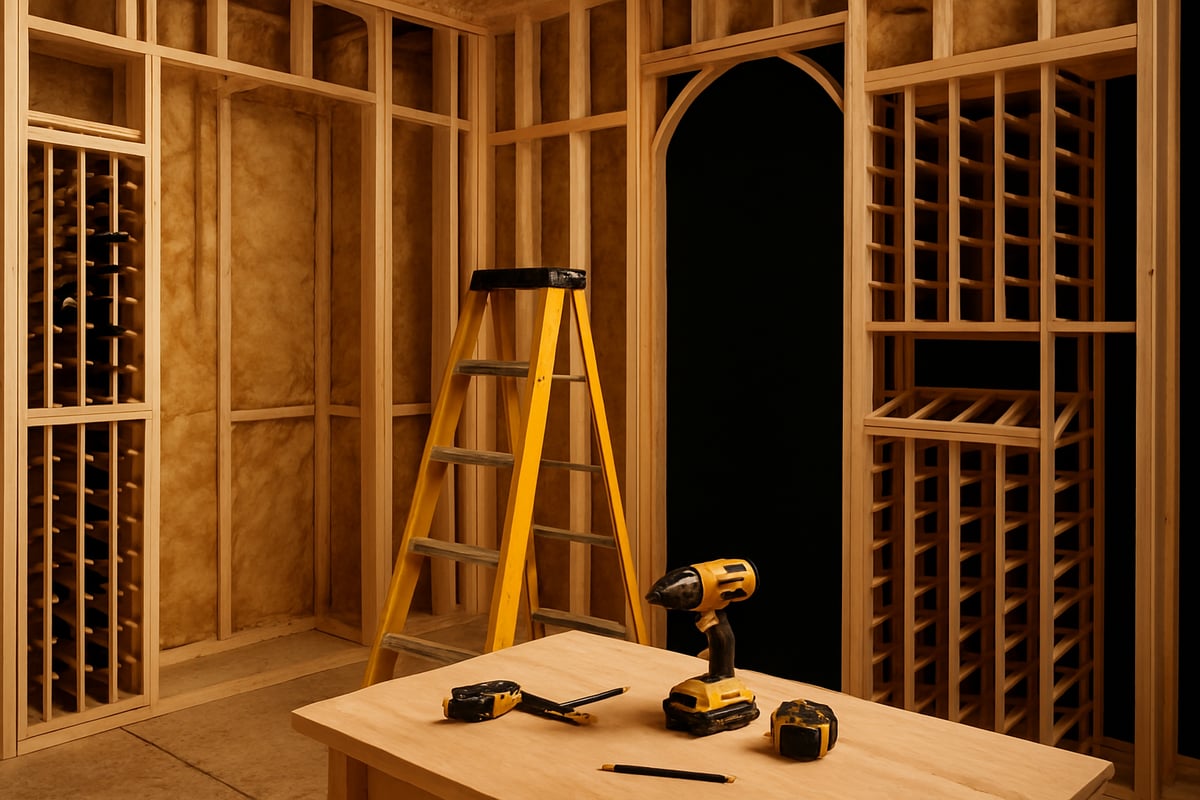
Step 2: Preparing the Space—Framing, Insulation, and Vapor Barriers
Designing the perfect environment to build a wine cellar starts long before the first bottle arrives. The secret to lasting performance and luxury is careful preparation—making smart choices in framing, insulation, and moisture control. Let’s walk through each step so your investment stands the test of time.
Framing the Cellar
A solid frame is the backbone when you build a wine cellar. Most experts recommend using 2x6 lumber for walls and 2x10 for ceilings. This allows for thicker insulation, which is essential for climate control.
In moisture-prone areas, pressure-treated wood is a must. It resists rot and provides extra durability. Here’s a quick breakdown:
2x6 walls: Accommodate higher R-value insulation.
2x10 ceilings: Extra space for insulation and air barriers.
Pressure-treated lumber: Best for any area with potential moisture exposure.
Proper framing not only supports the weight of wine racks but also improves energy efficiency, which is vital for any plan to build a wine cellar.
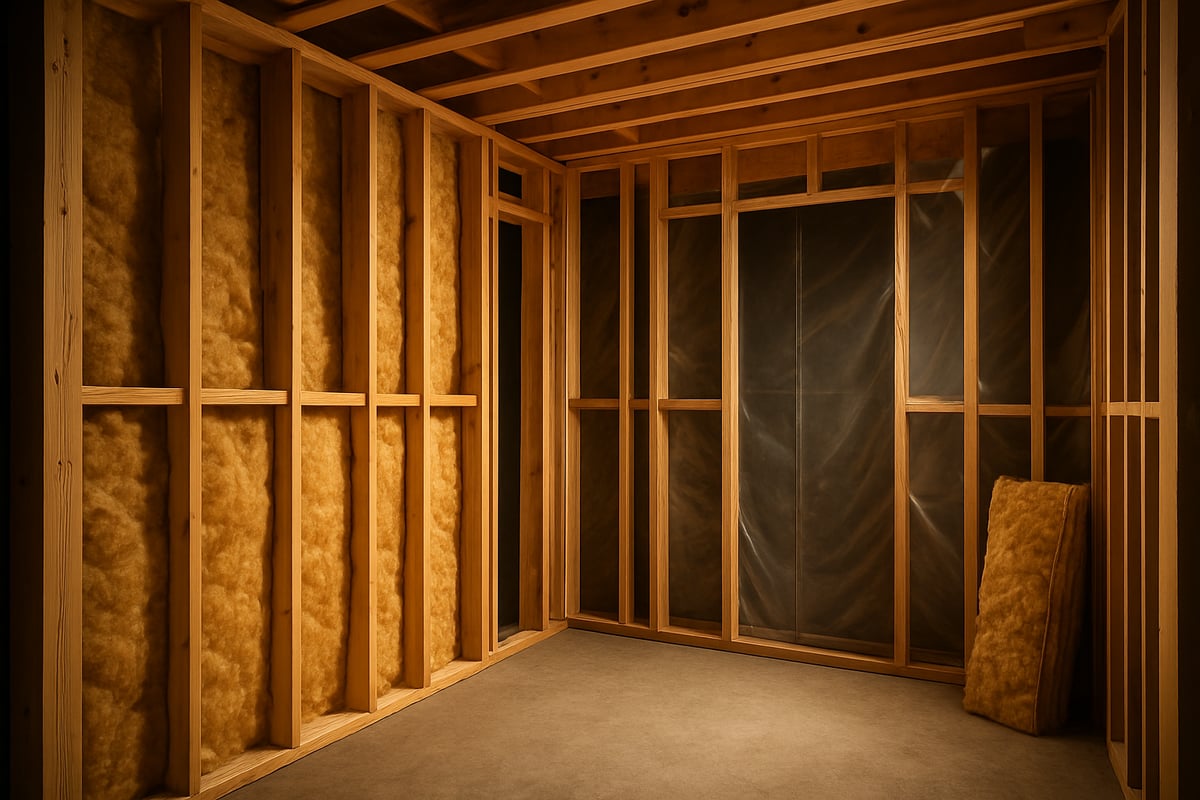
Installing Insulation
The next step when you build a wine cellar is insulation. Closed cell spray foam is regarded as the gold standard. It delivers superior R-values and moisture control. For walls, aim for R-19, and for ceilings, R-30.
Here’s a quick comparison of insulation types:
Insulation Type | R-Value per Inch | Moisture Resistance | Notes |
|---|---|---|---|
Closed Cell Spray Foam | ~R-7 | Excellent | Seals gaps, acts as vapor barrier |
Rigid Foam Board | R-4 to R-6 | Good | Needs separate vapor barrier |
Fiberglass Batts | R-3.5 | Poor | Always requires vapor barrier |
For extra detail on best practices and materials, check out this Wine Cellar Insulation Guide.
Choosing the right insulation will help you build a wine cellar that maintains stable temperature and humidity for years.
Vapor Barriers and Moisture Management
When you build a wine cellar, vapor barriers are non-negotiable. Their main job is to keep moisture from passing through walls and ceilings, which could cause condensation and mold.
If you use spray foam, you usually don’t need a separate barrier. For other types, like fiberglass or rigid foam, install the vapor barrier on the warm side of the wall.
Neglecting this step can lead to costly repairs down the road. Always double-check placement and seal every seam to protect your investment as you build a wine cellar.
Sealing Outlets and Ductwork
Airtightness ensures your effort to build a wine cellar is not wasted. Every opening—electrical outlets, lighting fixtures, and ductwork—must be sealed to prevent air and moisture leaks.
Use green board, a moisture-resistant drywall, for added protection. Here are some essential steps:
Apply foam sealant around outlets and penetrations.
Use gaskets or caulk for light fixtures.
Inspect every joint for gaps before finishing.
A properly sealed space is the foundation for a stable, energy-efficient environment when you build a wine cellar.
Preparing Floors and Ceilings
The final step before racking is prepping your floors and ceilings. Concrete is the most popular choice when you build a wine cellar, but alternatives like cork, tile, or hardwood can work if properly sealed.
Make sure concrete floors cure for at least 28 days before sealing. Every surface should be moisture-proofed to protect your collection.
Whether you choose classic concrete or a warmer material, a well-prepared floor sets the stage for a stunning and functional space as you build a wine cellar.
Step 3: Climate Control—Temperature, Humidity, and Ventilation
Achieving perfect climate control is the heart of any successful build a wine cellar project. Whether your collection is modest or grand, maintaining stable conditions ensures every bottle matures gracefully. Let’s explore how to create an environment worthy of your investment.
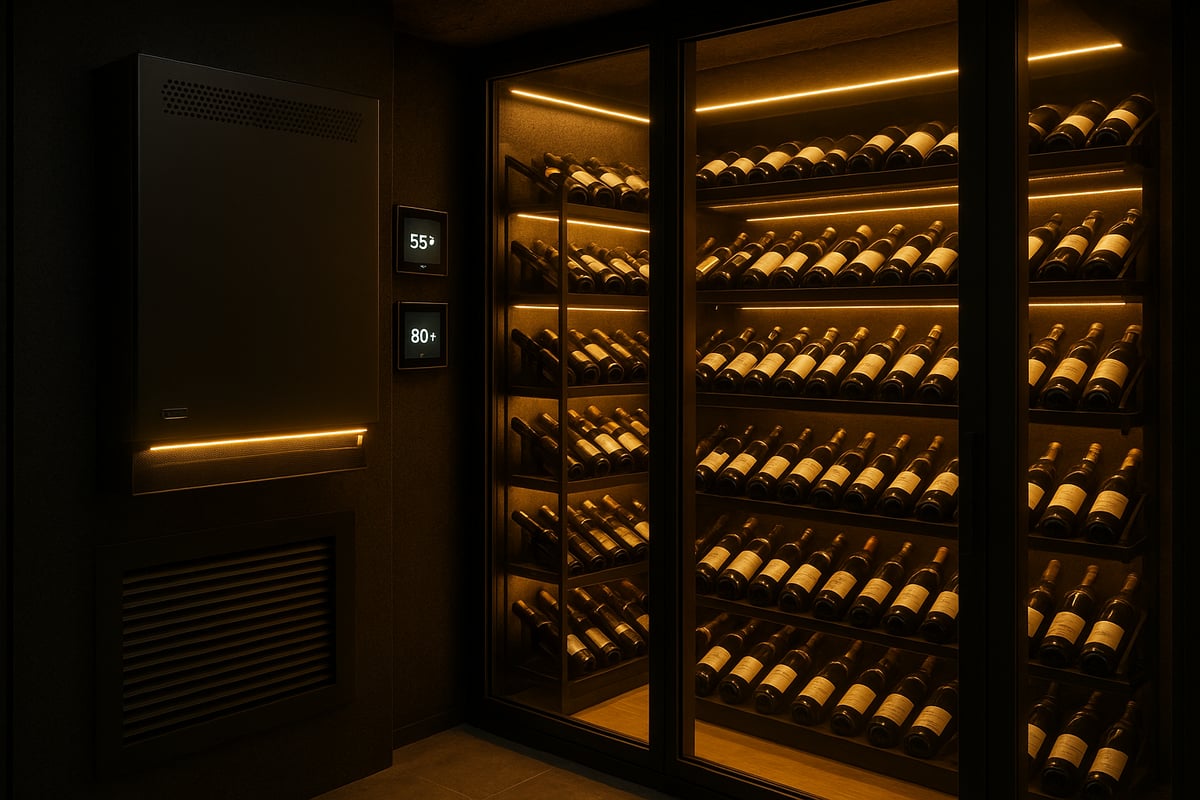
Setting Optimal Wine Storage Conditions
To build a wine cellar that truly protects your collection, you need to master temperature and humidity. The gold standard is 55°F (13°C), but a safe range is 50–60°F. Humidity should sit between 50% and 70%. Consistency is crucial, since fluctuations can damage corks and spoil wine.
Here’s a quick reference:
Factor | Ideal Range | Why It Matters |
|---|---|---|
Temperature | 50–60°F | Slows aging, preserves flavors |
Humidity | 50–70% | Prevents corks from drying out |
If you plan to build a wine cellar, remember that basements usually offer more stable conditions than above-ground rooms. Regularly monitor your environment to avoid costly mistakes.
Selecting a Cooling System
Choosing the right cooling system is essential when you build a wine cellar, as this equipment maintains ideal conditions year-round. There are several types to consider:
Through-the-wall units: Easy to install, best for smaller spaces.
Ducted systems: Quiet, with flexible installation options.
Split systems: Powerful, with separate evaporator and condenser.
Self-contained units: All-in-one, suitable for moderate climates.
Always size your unit based on the room’s volume, insulation, and any glass features. For example, a 250 cubic foot cellar may need a system rated for 650 cubic feet to ensure efficiency. For a deep dive into options and sizing, consult Wine Cellar Cooling Essentials for expert guidance.
Humidity Control Solutions
No matter how you build a wine cellar, humidity control is vital. Integrated humidifiers and dehumidifiers can manage the balance automatically. Digital hygrometers and smart sensors let you monitor levels at a glance.
Consider these solutions:
Standalone humidifiers for dry climates
Dehumidifiers for damp basements
WiFi-enabled sensors for remote monitoring
A well-managed system prevents mold and keeps corks healthy, ensuring your wines age as intended.
Ventilation Strategies
Proper ventilation is often overlooked when people build a wine cellar, but it’s critical for preventing mold and stale odors. Install dedicated vents or passive airflow systems to keep air fresh.
Tips for effective ventilation:
Use vented doors or louvers if possible
Avoid blocking airflow with racks or boxes
Periodically check for damp or musty smells
Good ventilation protects your collection and the room itself from long-term damage.
Energy Efficiency and Smart Controls
Modern technology makes it easier than ever to build a wine cellar that’s both efficient and convenient. Many climate systems now offer app-based controls, energy-saving modes, and real-time alerts.
Smart upgrades to consider:
Programmable thermostats for custom schedules
Motion-activated LED lighting
Remote monitoring via smartphone
Efficient climate systems reduce utility costs and safeguard your wine even when you’re away, making your wine cellar a seamless part of modern living.
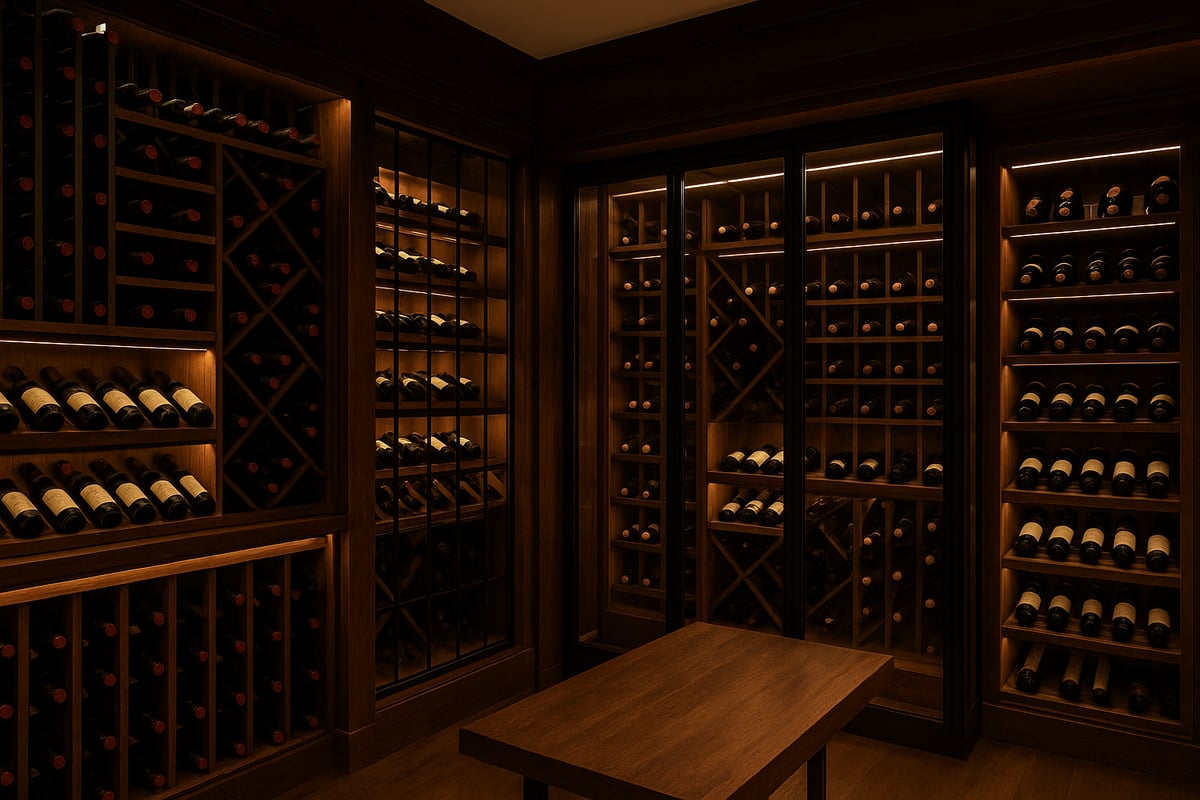
Step 4: Wine Racking, Storage, and Display Solutions
Designing the perfect racking and storage system is at the heart of any effort to build a wine cellar that is beautiful, functional, and secure. The right choices here set the stage for both the preservation and presentation of your collection. Let’s explore the essentials to make your wine cellar a true showcase.
Types of Wine Racks and Materials
When you build a wine cellar, choosing the right racking materials is a foundational step. Wood racks, such as oak, mahogany, and pine, remain classics for their warmth and durability. Metal racks offer a modern, minimalist aesthetic, while acrylic and cable systems provide clean lines and a floating effect that suits contemporary spaces.
You’ll also decide between modular and custom-built racks. Modular racks are affordable and flexible, making them ideal for evolving collections. Custom racks, on the other hand, can be tailored for unique spaces and bottle formats, delivering a truly bespoke look. For a detailed breakdown of racking types and design inspiration, check out these Wine Racks and Storage Solutions.
Material | Pros | Cons |
|---|---|---|
Oak | Durable, classic | Higher cost |
Metal | Sleek, modern | Can be cold |
Acrylic | Minimalist, light | Scratches easily |
Pine | Affordable, flexible | Softer wood |
Designing for Capacity and Accessibility
One of the most important tasks as you build a wine cellar is planning for current and future bottle capacity. Most home cellars accommodate 100 to 500+ bottles, but your needs may grow with your passion. Always measure your available space and map out racking to maximize storage without overcrowding.
Horizontal storage is vital for keeping corks moist and bottles secure. Be mindful of bottle shapes—Champagne and Burgundy bottles need wider row spacing than standard Bordeaux bottles. A quick guideline: allow at least 3.5 inches per row, but consider a mix of slot sizes for versatility. Thoughtful planning here means easy access and fewer headaches down the line.
Display Features and Lighting
To build a wine cellar that truly highlights your collection, incorporate display features that match your style. Angled displays and label-forward racks showcase prized bottles, making them the stars of your cellar. Glass enclosures add drama, letting you turn your collection into a visual centerpiece in dining spaces or lounges.
Lighting is just as critical. Use LED lights for ambiance and to protect wine from UV rays. Avoid direct sunlight at all costs, as it can quickly degrade your precious bottles. Strategically placed lighting can transform your wine cellar into a space you’re proud to share with guests.
Anchoring and Safety Considerations
Safety is non-negotiable when you build a wine cellar, especially in regions prone to earthquakes or when storing valuable bottles. Secure all racking to the walls with L-brackets or sturdy anchors to prevent tipping. Always check load ratings to ensure your racks can handle the weight.
In some areas, building codes may require additional safety measures. Overloaded or poorly anchored racks can lead to disaster, risking both your investment and your enjoyment. Take the time to get anchoring right for peace of mind.
Customization and Finishes
Personal touches make your cellar unique. As you build a wine cellar, consider staining, painting, or finishing racks to match your home’s décor. Integrate tasting tables, cabinets, or even art pieces for a space that reflects your personality.
Unfinished pine can be stained for a professional look, while mahogany or walnut offer natural elegance. Add custom features like glass accents or illuminated shelves for a modern twist. The goal is to create a cellar that not only stores wine, but elevates your entire living experience.
Step 5: Doors, Flooring, and Aesthetic Finishes
Your choices for doors, flooring, and finishes are the crowning touches when you build a wine cellar. These details do more than look good—they protect your collection and set the tone for your space. Let’s walk through each finishing element to ensure your cellar stands out in both function and design.
Selecting the Right Wine Cellar Door
When you build a wine cellar, the door is your first line of defense against temperature swings and humidity loss. Choose an insulated, exterior-grade door for maximum climate control. If you love the look of glass, select dual-pane, UV-protected models with thermal breaks. Proper sealing is critical—a well-installed door makes a satisfying “pop” when opened, proving its airtight fit.
For more on door styles and customization, see Custom Wine Cellar Design Tips.
Flooring Options and Installation
Flooring plays a pivotal role when you build a wine cellar, impacting both beauty and performance. Concrete is a favorite for its durability, but cork, hardwood, porcelain tile, and stone are popular as well. Always ensure floors are properly sealed to prevent moisture issues and maintain cellar humidity. If you choose concrete, allow a full 28-day cure before sealing or installing racks.
Need more on preparation and installation? The Wine Cellar Preparation Guide covers essential steps for a flawless foundation.
Wall Treatments and Decorative Finishes
Walls are your canvas when you build a wine cellar. Options include faux or natural stone, brick, tile, stucco, or classic wood paneling. Pick finishes that resist humidity and mold, ensuring longevity. Wood paneling brings warmth, while stone or tile evokes an old-world wine cave. Decorative touches, such as custom murals or textured finishes, can elevate your cellar’s atmosphere and make it truly unique.
Lighting and Ambiance
Lighting is the secret ingredient when you build a wine cellar that feels both inviting and protective. Dimmable, UV-free LED fixtures highlight your bottles and prevent wine degradation. Accent lighting along racks or within display cases adds drama and sophistication. Avoid direct sunlight at all costs. Smart lighting systems let you tailor the mood for tastings, special occasions, or everyday enjoyment.
Integrating Technology and Modern Touches
Modern features add convenience and luxury when you build a wine cellar. Smart controls for lighting, temperature, and security blend seamlessly into your design. Consider WiFi-enabled sensors for easy monitoring and smart locks for added security. Digital display screens can manage your collection or showcase your favorite vintages. These upgrades give your cellar a contemporary edge while keeping your wine safe.
Step 6: Maintenance, Monitoring, and Collection Management
A well-designed wine cellar is just the beginning. To truly protect your investment and savor every bottle, ongoing care and smart management are essential. In this final step, we’ll show you how to maintain, monitor, and organize your cellar so you enjoy the rewards of your decision to build a wine cellar for years to come.
Ongoing Cellar Maintenance
Routine maintenance is key to preserving both your wine and the space itself. After you build a wine cellar, inspect climate control systems, door seals, and racking regularly. Dust the racks, clean vents, and watch for any signs of mold or excess moisture.
Schedule professional maintenance for complex systems annually. This ensures everything runs efficiently, preventing costly repairs later. Taking the time to build a wine cellar properly pays off when you keep it in peak condition.
Monitoring Temperature and Humidity
Consistent temperature and humidity are the backbone of wine preservation. Use digital, WiFi-enabled sensors to monitor conditions around the clock. For best practices and guidelines on optimal storage, you can refer to Ideal Wine Cellar Temperature and Humidity.
Set up alerts to notify you if there’s a deviation from your set range. This proactive approach helps ensure the environment you created when you decided to build a wine cellar stays ideal for every vintage.
Organization and Inventory Management
Keeping track of your collection is both practical and rewarding. Label each bottle clearly and consider digital inventory apps or cellar management software. Organizing by varietal, region, or vintage makes every selection feel like a curated experience.
When you build a wine cellar, planning for smart organization saves time and reduces the risk of missing out on aging windows. Many apps let you record tasting notes and track cellar value, making collection management effortless.
Security and Insurance
Your wine collection is an investment worth protecting. Install locks, security cameras, or even smart alarms, especially for high-value cellars. Proper security is a must when you build a wine cellar in your home.
Don’t forget to update your home insurance policy. Some collections require specialized riders to cover their full value. Peace of mind comes from knowing your investment is safe.
Preparing for Expansion or Upgrades
As your passion grows, so will your collection. Modular racks and scalable climate systems allow you to adapt your space without major renovations. Think ahead when you build a wine cellar, choosing solutions that make expansion easy.
Upgrading finishes or integrating new technology can keep your cellar feeling fresh and functional. Planning for the future ensures your cellar evolves with your tastes and needs.
Whether you’re imagining a cozy cellar under your stairs or an expansive glass wine room for your estate, building a wine cellar in 2026 is all about blending vision, craftsmanship, and innovative technology. At every step—from choosing the right site and climate control to creating a striking display that enhances your collection—we’re here to make your dream a reality. If you’re ready to elevate your home or business with a space that’s both timeless and uniquely yours, let’s start the conversation. Reach out today and Contact Us—we can turn your vision into a showpiece worth celebrating.
Your Dream Wine Cellar Starts Here
Let our design team craft a cellar that matches your taste, space, and your collection — built for beauty, function, and prestige.
Email us at
Visit our office